
Stitches used in this kit
Watch the video or click the stitch diagram to be taken to the full tutorial!
Straight Stitch

Bring the needle UP at 1. Insert needle DOWN at 2 at the desired stitch length.
Seed Stitch

Bring the neelde UP at 1. Insert needle DOWN at 2. Come UP at the beginning of the next stitch (3).
Running Stitch
Bring needle UP at 1. Bring needle DOWN a stitch length away at 2. Bring needle UP at 3. Continue along line.
Backstitch

Bring needle UP at 1. Insert needle DOWN at 2 making a stitch backwards along the line to meet last stitch. Come UP at 3 a stitch length away from 1. Continue along line.
Split Stitch

Bring needle UP at 1. Insert needle DOWN a stitch length away at 2. Come UP at 3, piercing the previous stitch with the needle, splitting the floss strands in half. Continue along the line. Works best when using an even amount of floss strands.
Stem Stitch

Blanket Stitch
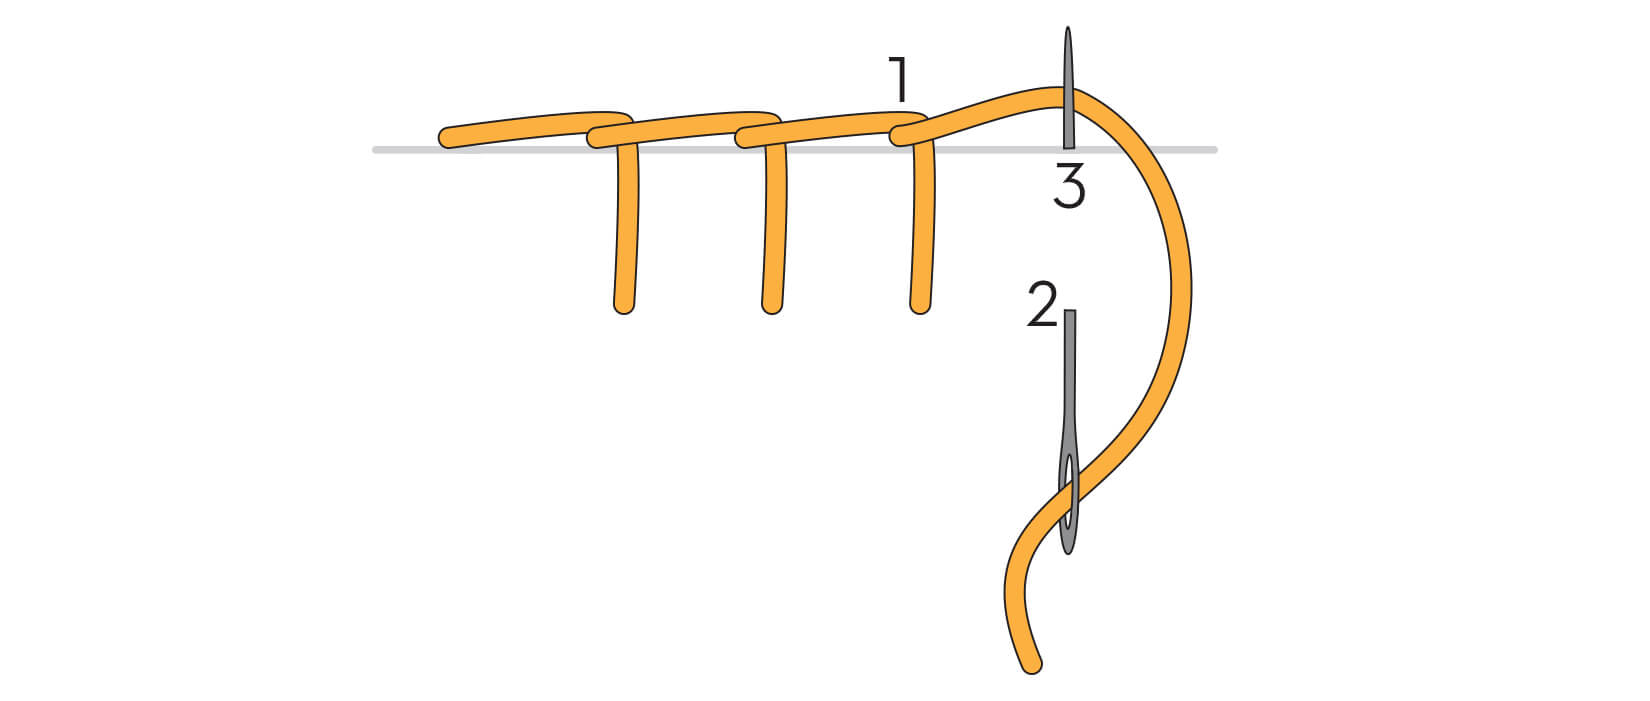
Bring needle UP at 1. Insert needle DOWN at 2, a stitch length both to the right and down from line. In the same motion, come UP at 3, perpendicular to line. Place floss under needle tip and finish pulling needle to front of fabric. Continue along line. To end the row, make a tiny stitch over last stitch, securing the stitch in place.
Chain Stitch
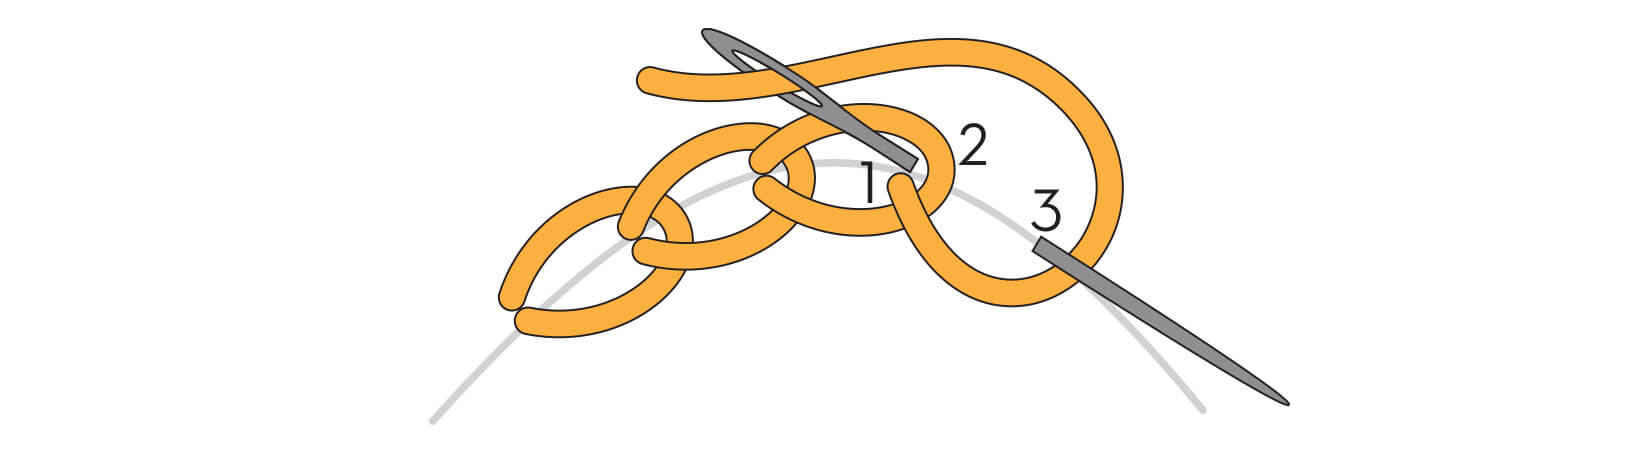
Bring needle UP at 1. Insert needle DOWN at 2 through same hold as 1. In the same motion, come UP at 3. Loop floss under needle and pull needle through the loop. Continue along line. To end a row, make a tiny stitch over loop, securing it in place (4).
Single Chain Stitch

Bring needle UP at 1. Insert needle DOWN at 2 through same hole as 1. In the same motion, come UP at 3. Loop floss under the needle and pull needle through the loop. Make a tiny stitch over loop, securing loop in place (4).
Lazy Daisy Stitch

Bring the needle UP at 1 near center point mark. Insert needle DOWN at 2 through same hole as 1. In the same motion, come UP at 3. Loop floss under needle and pull needle through the loop. Make a tiny stitch over loop, securing loop in place (4). Come UP at 5. Continue making stitches around center point.
French Knot Stitch

Bring needle UP at 1. Point needle away from fabric. Wrap floss around the needle twice. Now point the needle towards fabric and insert needle point at 2, a few fabric threads from 1. Pull floss snug against needle and fabric. Slowly pull needle DOWN to back of fabric until knot is secure.
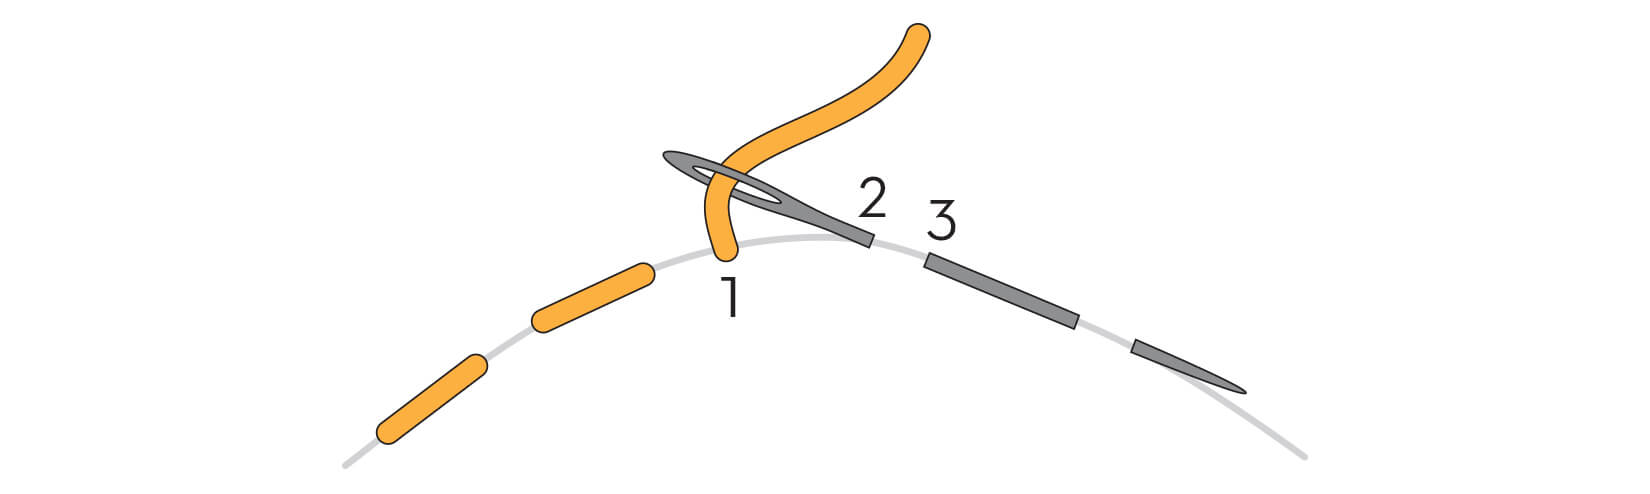
Feather Stitch

Bring the needle UP at 1. Insert the needle DOWN at 2 to the right and a stitch length away from 1. In the same motion, come UP at 3, a stitch length below the center point of 1 and 2. Start the next stitch a stitch length to the right at 4, coming UP at 5. Start the next stitch by moving to the left a stitch length. Continue making stitches to the right and then to the left. Secure the last stitch by making a small stitch over the loop.
Satin Stitch

Bring needle UP at 1 on edge of shape. Insert needle DOWN directly across on opposite edge of shape at 2. Come UP at 3 on first edge of shape, one to three fabric threads away from 1. Continue filling in shape with stitches.
Long and Short Stitch

Row 1: Working along the edge of the shape, make stitches next to each other, alternating between long and short stitches. The short stitches should be about half the length of long stitches. Row 2: Work long stitches in the spaces created by the short stitches. Continue with more rows until you've reacahed the opposite side of the shape.
Buy the pattern!

Stitching Raccoon Sampler Embroidery Kit
